Adding custom PV Panel to PVsyst
Published:
By Jeff MacKinnon, P.Eng., PE
PVsyst has one of the best databases for PV Solar components available, but even they won't have everything. This tutorial will go through the steps needed to add a custom PV panel to your database.
Importing PAN files
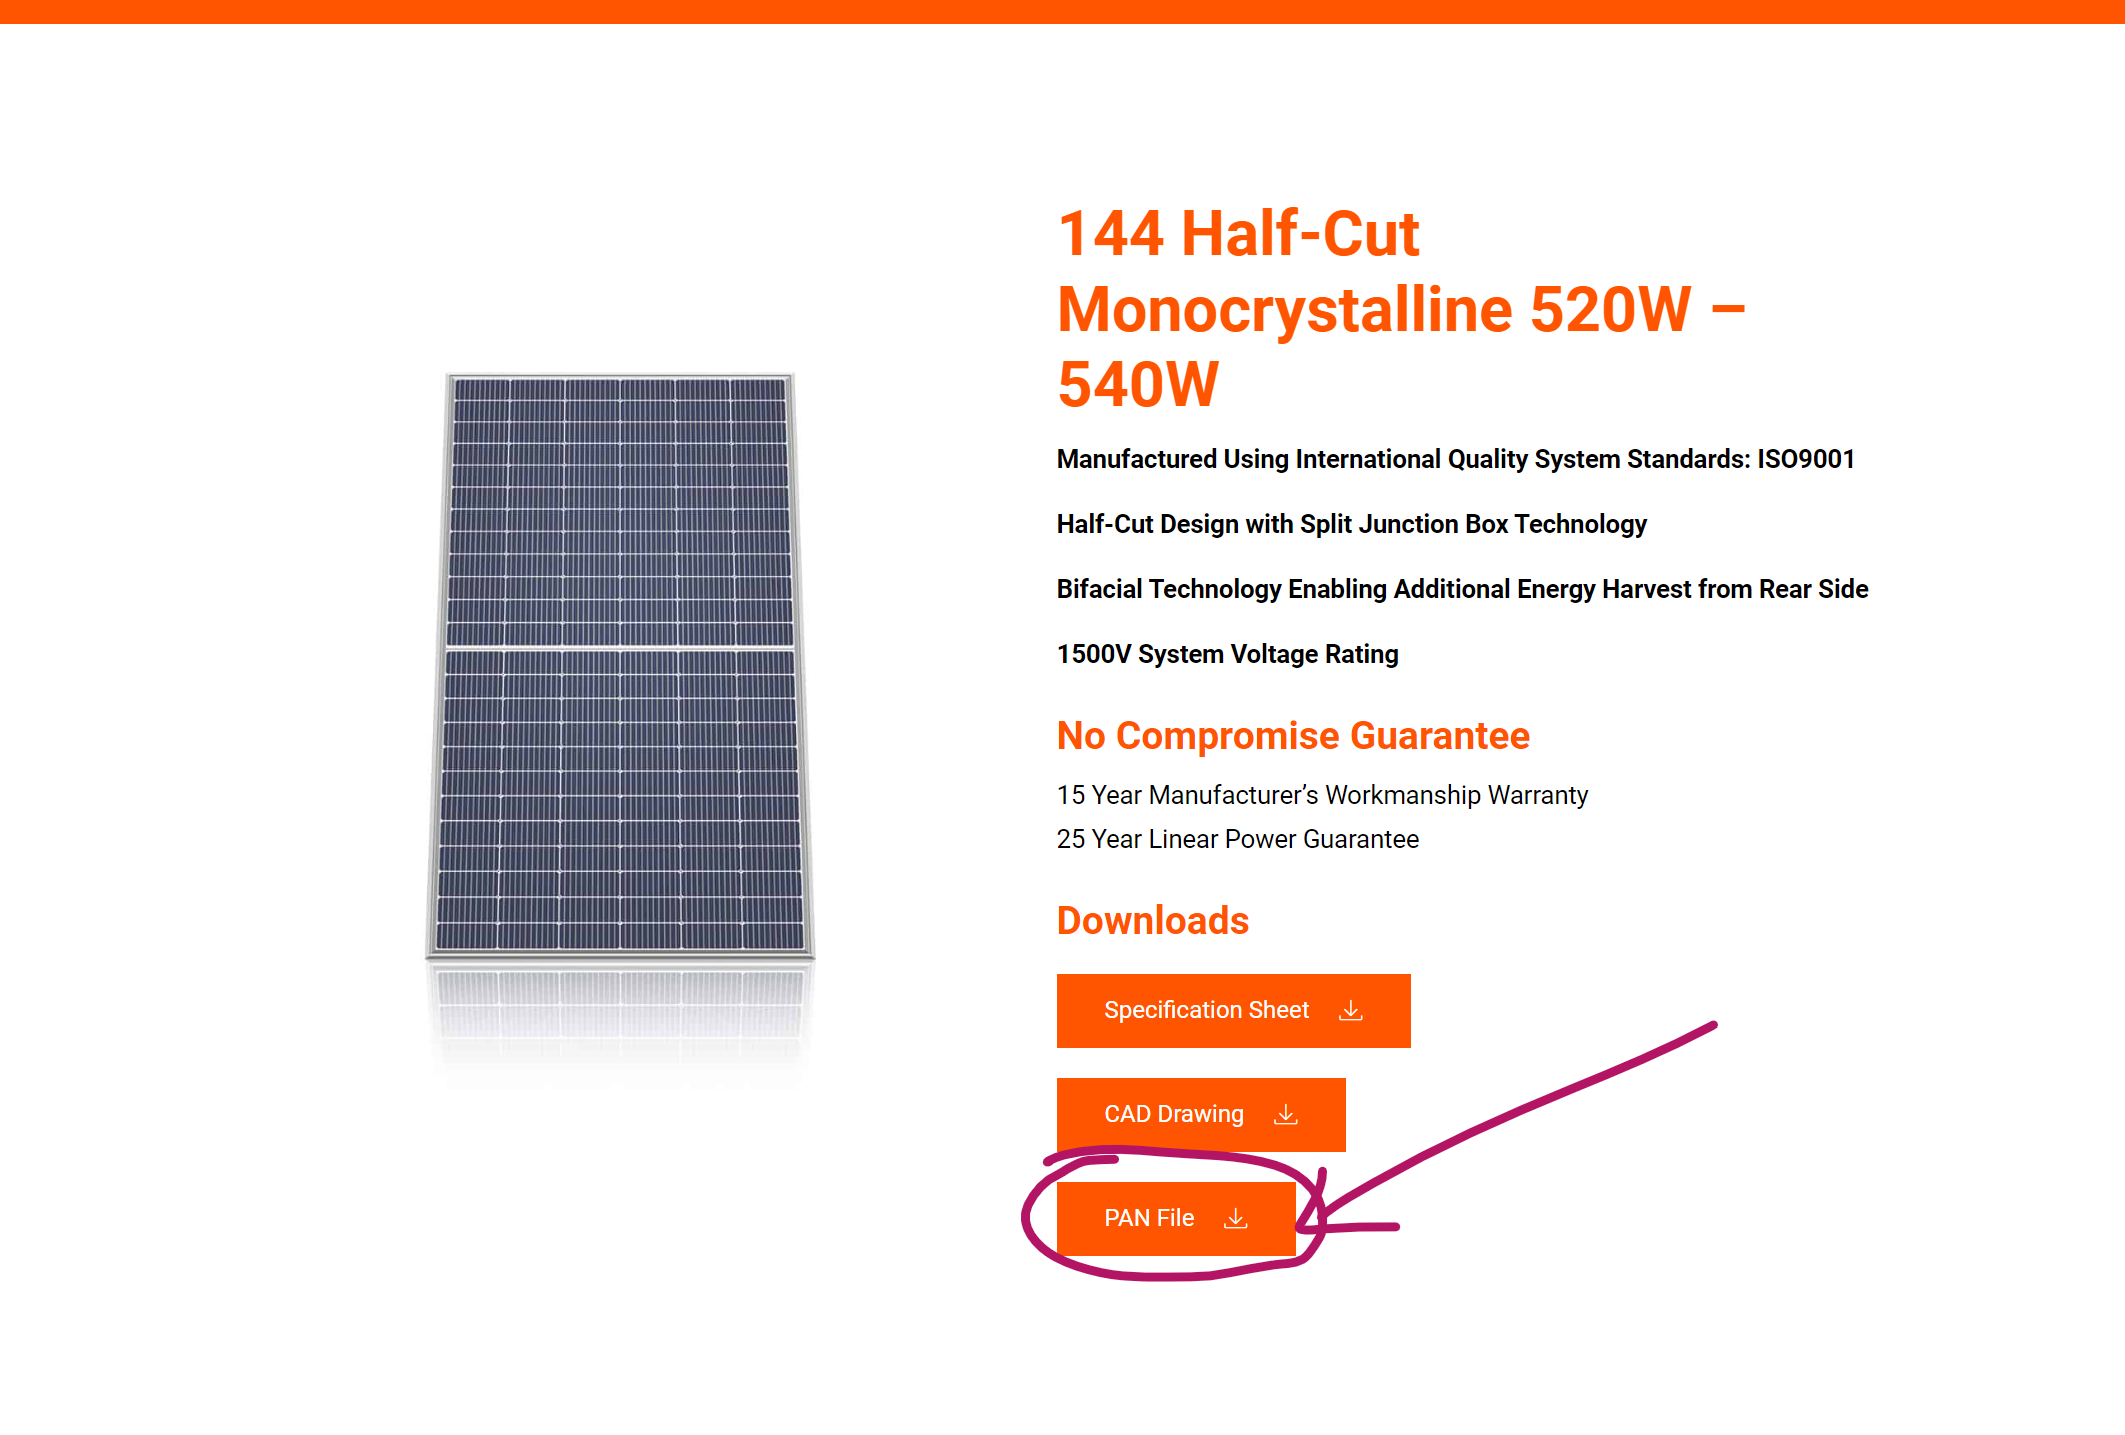
The easiest way to do this is if the manufacturer has published their PAN files. I'm using the 144HC M10 SL Bifacial Module and am lucky. Heliene has published their PAN files, you can find them on the product page.
Step 1 - Download
Download the PAN files. If there are multiple modules in this series, the example I'm using has 5 different power ratings (520-540W) the download will typically be a .zip file.
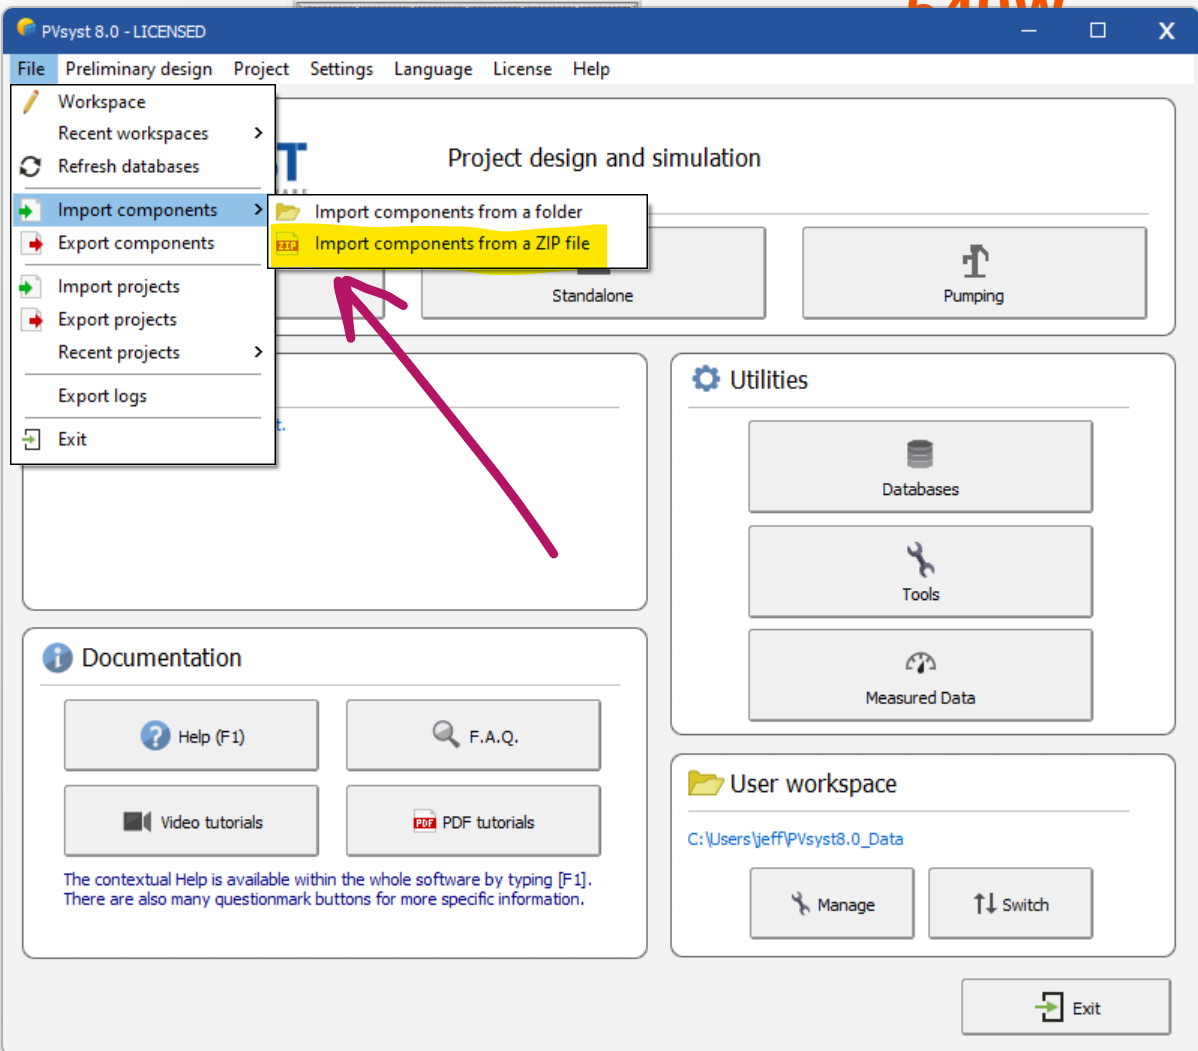
Step 2 - Open Import Components Dialog Box
Next, open the Import Components Dialog box in PVSyst. In this example select the Import Components from a ZIP file.
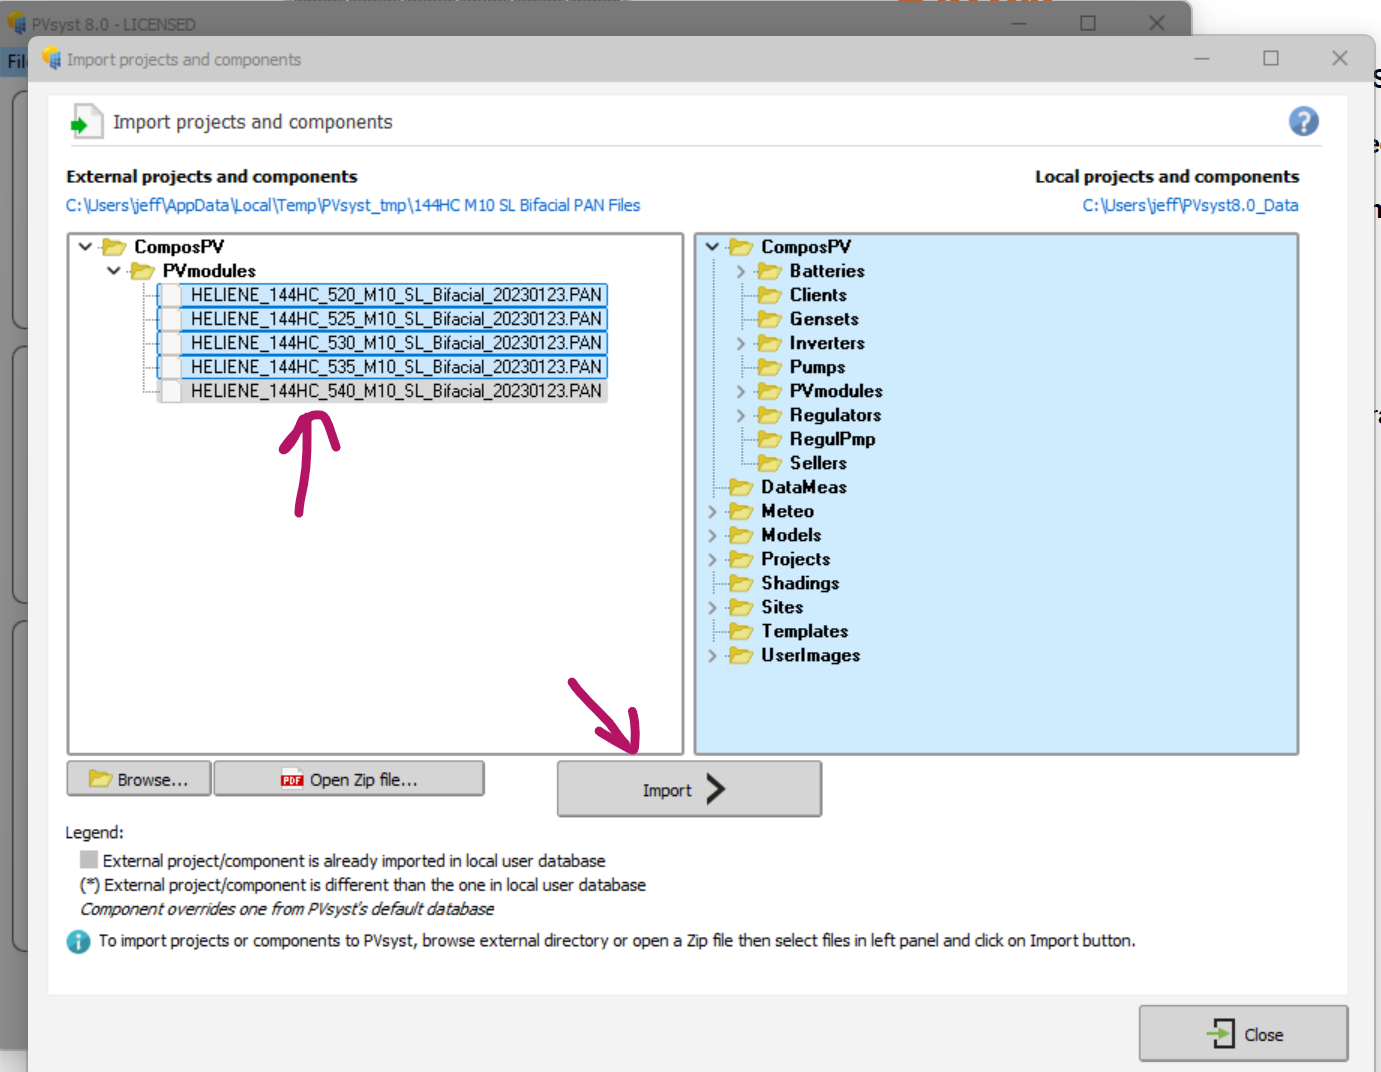
Step 3 - Select the PV Modules to Import
If you are only importing a sub-set of the modules in the ZIP file, you can select the one that you want. I typically will import all the modules, it really doesn't take up a lot of space.
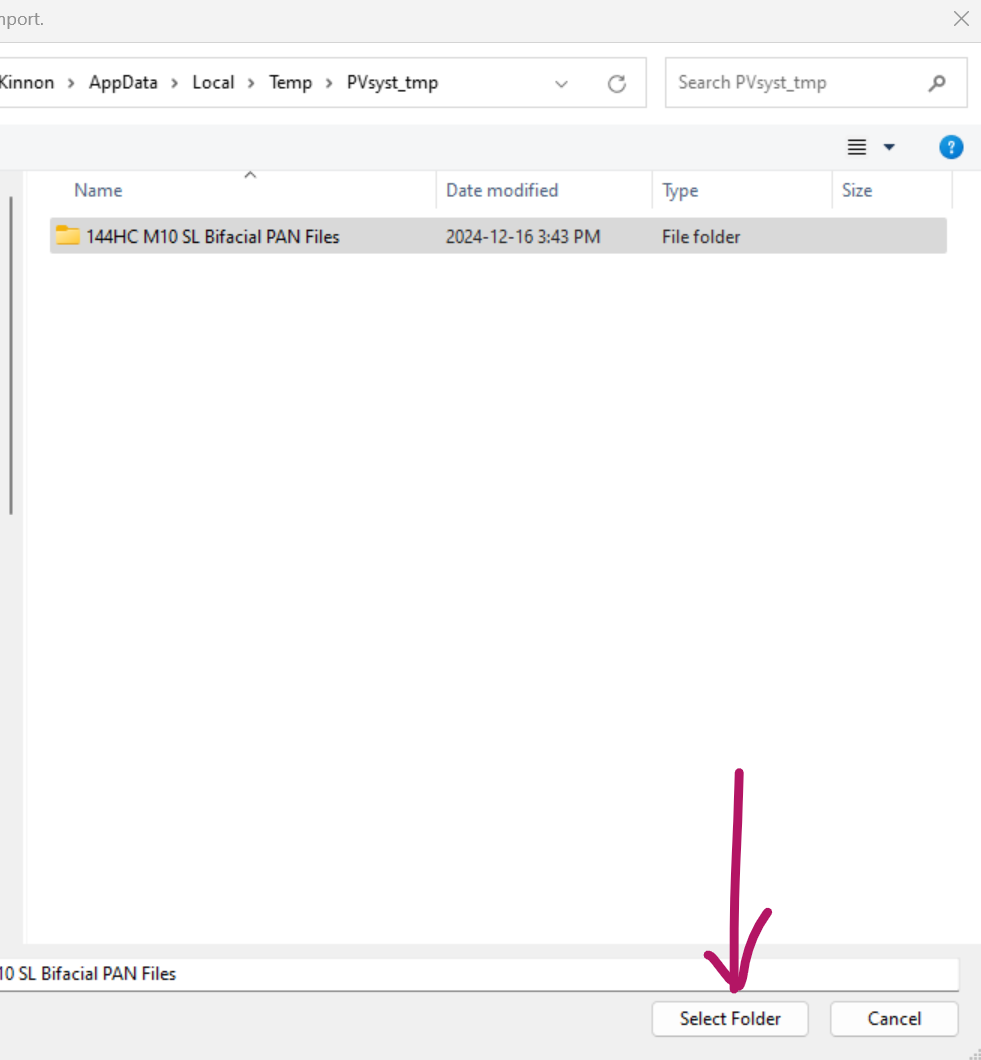
If the modules don't show up immediately, you may need to click the browse button and open the folder from the Windows Temp folder directly. The button should take you to the root folder, where it placed the un-zipped file, directly.
Finally click the 'Import >' button.
Step 4 - Check that it worked
When its done, you should be able to open any project and check to make sure that the components were added. They will be highlighted in the dropdown box.
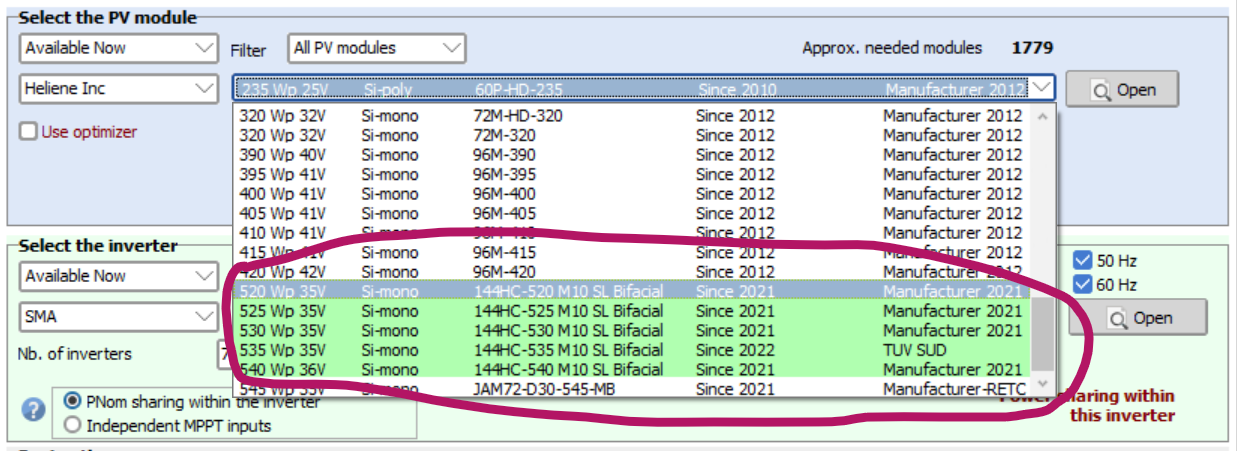
And your done
That should be everything. If you need to import a complete custom panel, without the PAN file available, there is a way to do that too. I will add that tutorial on another Tuesday and link it here when its ready.

